
Market Snapshot#
August 20 was not a clean one-direction win. The strongest same-day story was the reset itself: the public @GTMO channel record showed a 4494–4490 BUY closed after the setup failed, a 4490.8–4495 SELL that reached the explicitly reported TP1, and a final 4491–4487 BUY that reached TP1 and TP2 before protection moved to breakeven. Readers who want free signals + FREE VIP channel access can message @GTMOBest early and follow the next public update.
The wider market supplied a volatile backdrop. At the 21:00 GMT+7 capture, New York trading was still in progress. A same-day CNBC spot-gold reference reported $4,474.76 per ounce at 9:00 a.m. ET, while the Yahoo Finance DXY history page displayed 98.85 in its August 20 table at 9:58 a.m. ET. Those are time-stamped intraday references, not final New York closes, so they support the context without pretending the day was already settled.
| Market reference | Same-day observation |
|---|---|
| XAUUSD | $4,474.76 spot reference at 9:00 a.m. ET; provisional |
| DXY | 98.85 displayed in the August 20 table at 9:58 a.m. ET; provisional |
| Broad structure | Same-day reporting described a rebound toward the 4524 area after a deep earlier swing |
| GTMO session | Failed BUY → recovery SELL TP1 → final BUY TP1/TP2 → breakeven protection |
The table is deliberately narrow. No final close, universal account result, or complete five-target SELL outcome is promoted because the same-day evidence does not support those stronger claims. The useful public record is the sequence: an early read failed, the next read changed with the structure, and the later BUY was managed with partial targets and protection.
Why The Tone Changed So Fast#
The tone changed because the tape refused to reward a straight-line story. The first BUY had a defined 4494–4490 entry zone, 4486 stop and four fixed target levels before an open extension. After the position floated and the stop was adjusted to 4484, the channel record stated plainly: “Setup failed, closing it.” That sentence is the boundary of the first setup. It is not a hidden win, and it is not a reason to rewrite the result after the fact.
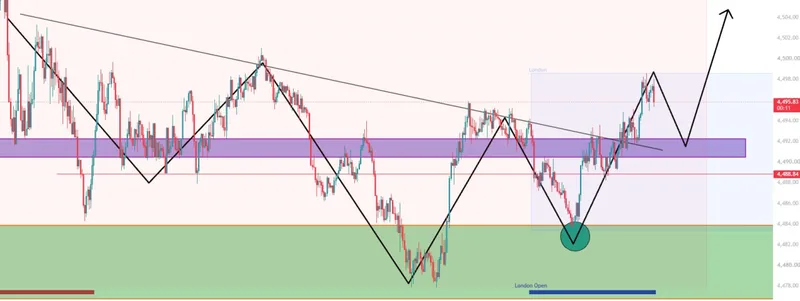
The next public read moved in the opposite direction. The SELL was framed around the falling-wedge and trendline structure, with London just opening and the earlier Asian structure described as bearish. The 4490.8–4495 zone, 4498 stop and 4488–4480 target ladder were specific enough to follow historically. TP1 was then reported, but the later record also said “Setup failed,” so the recap keeps the recovery claim at TP1 rather than converting it into a full target sweep.
The most human part of the day came in the reset language around the second sequence. The public record acknowledged that the earlier bullish attempt had failed, accepted the loss, and corrected the read by following the current structure. A later note also admitted that emotion and FOMO had affected the execution. That does not make the session a clean win; it makes the session useful because the difficult part was visible alongside the recovery.
For comparison, the August 19 daily gold report described a different session with two BUY setups and staged protection. The contrast is useful: one day can be cleaner than another, while the underlying discipline still comes from defining invalidation, reducing risk and reporting what actually happened.
Technical Outlook#
The same-day market context placed first support around 4470–4480, a secondary support band around 4430–4450, and resistance around 4524–4550. Those levels came from the visible same-day market references and are useful as historical context around the session’s large range. They are not a live entry plan for a later reader. The next trading decision would need fresh price action, a new risk boundary and new public evidence.
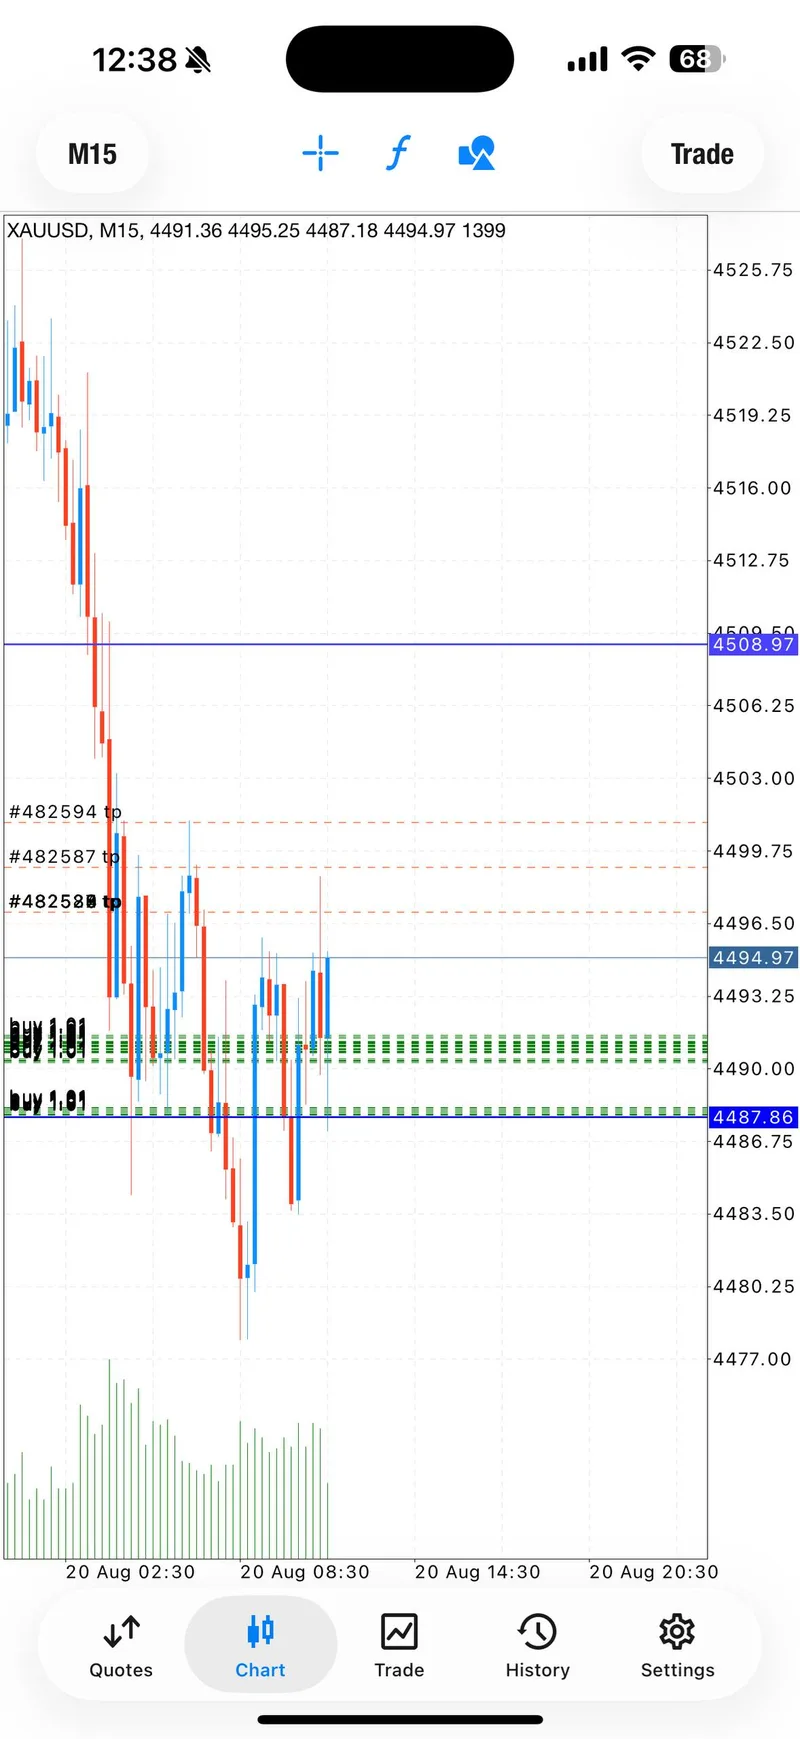
The GTMO setups themselves clustered around the 4490 area. The first BUY tried to hold a higher structure and was invalidated. The SELL then used the lower-side structure for a recovery attempt. The final BUY waited for a breakout and retest before using the 4491–4487 zone. That progression explains why the day cannot be reduced to “BUY worked” or “SELL worked.” Direction changed when the structure changed, and the public risk language changed with it.
The August 17 recap is another useful comparison because it shows how a failed BUY can sit inside a later sequence without becoming the headline by itself. For August 20, the proper technical takeaway is flexibility with a hard limit: confirmation can change, but the stop and the claim boundary must stay visible.
Trading Signals#
Signal 1 — BUY 4494–4490#
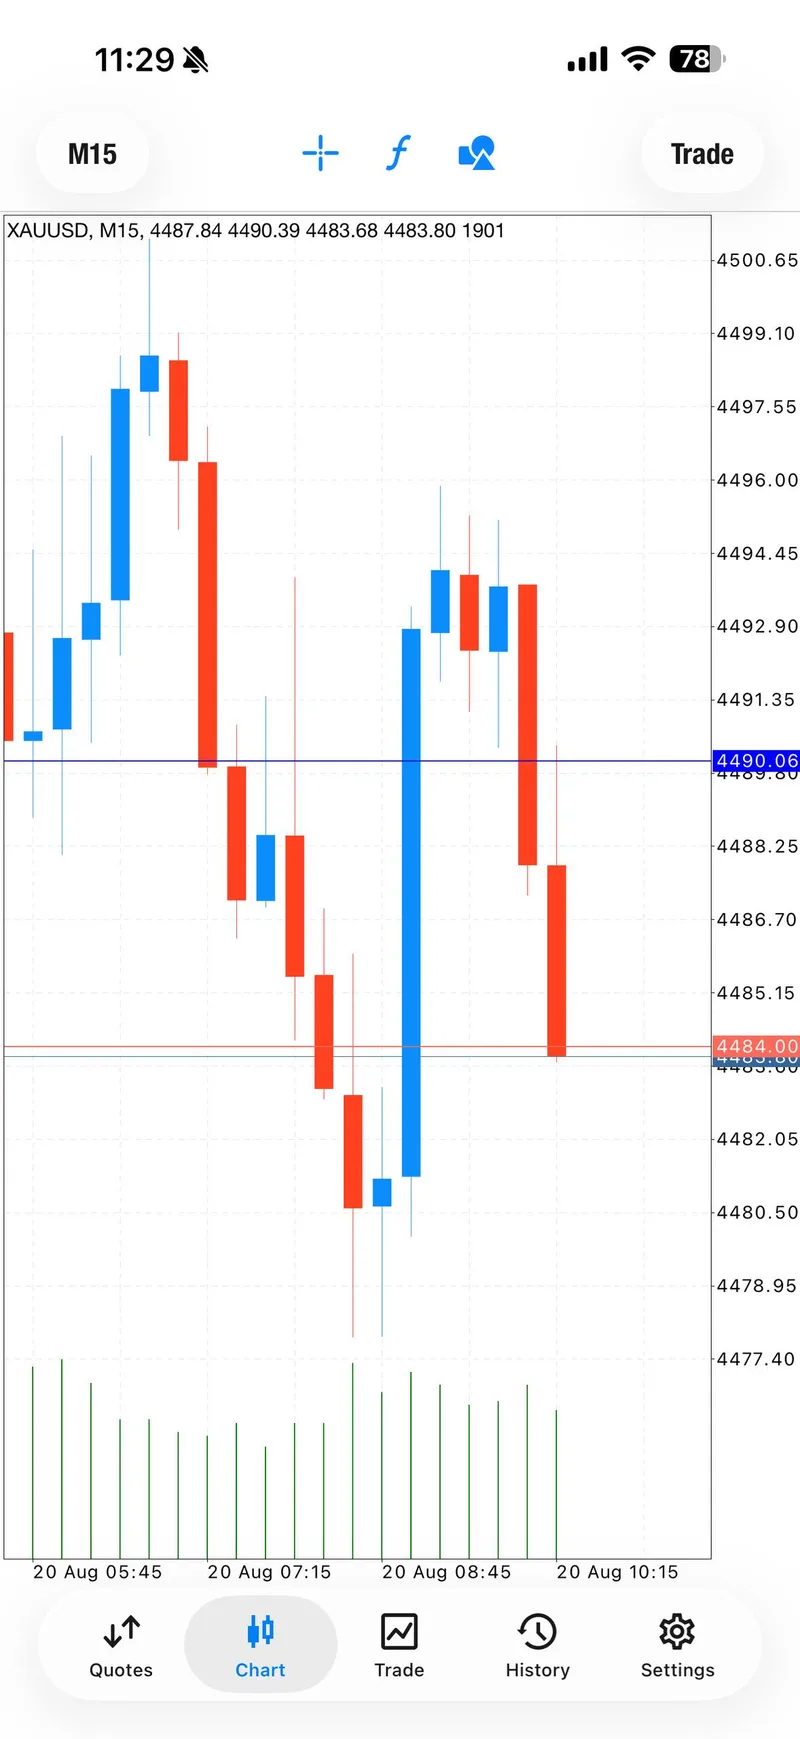
The first historical setup was a BUY from 4494–4490 with a 4486 stop and targets at 4496, 4498, 4500 and 4502, followed by an open extension. The same parameter set appeared in the public FREE and VIP channel records. During the sequence, the stop was moved to 4484 while the setup floated in the zone.
The result was explicit: the setup failed and was closed. A chart screenshot and the surrounding public notes described the setback and the effort to find a lower, cleaner entry. This report therefore records Signal 1 as an invalidated BUY, not as a completed target sequence. No profit, pips or points are attached to it.
Signal 2 — SELL 4490.8–4495#
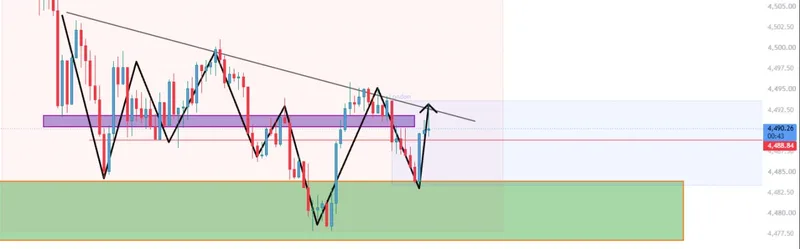
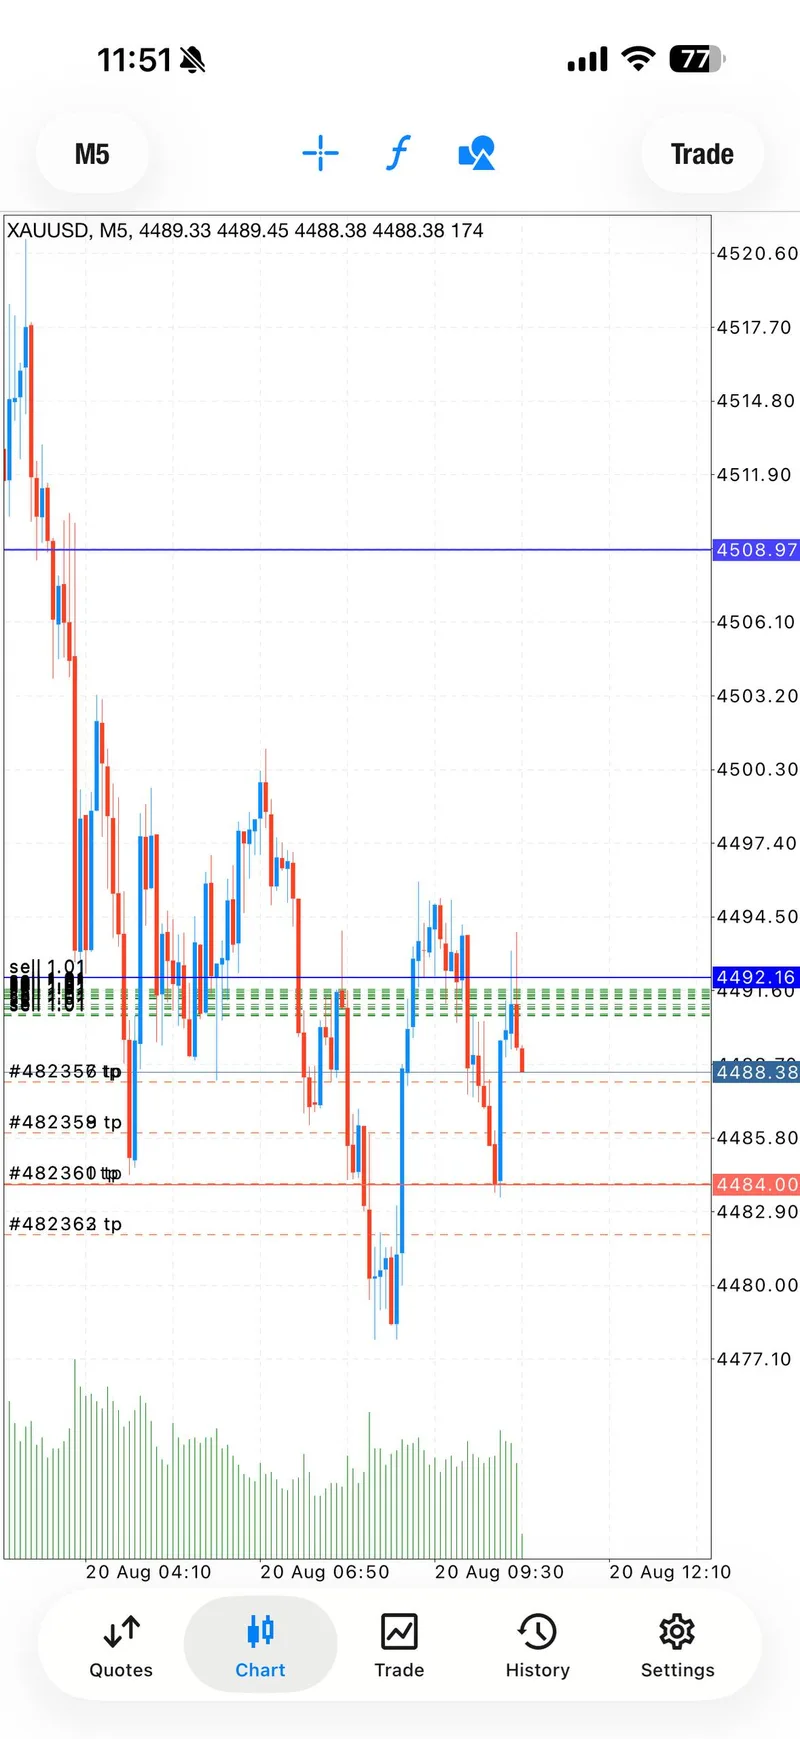
The recovery SELL used a 4490.8–4495 entry zone, a 4498 stop and targets at 4488, 4486, 4484, 4482 and 4480. The public chart explanation connected the idea to the falling wedge, trendline and the bearish structure visible at that point in the session.
The channel then reported TP1. That is the strongest verified outcome for this sequence. The later “Setup failed” update means the article does not claim that every lower target completed, and it does not turn a managed recovery attempt into a universal win. The evidence supports TP1 plus active management, no more.
Signal 3 — BUY 4491–4487#
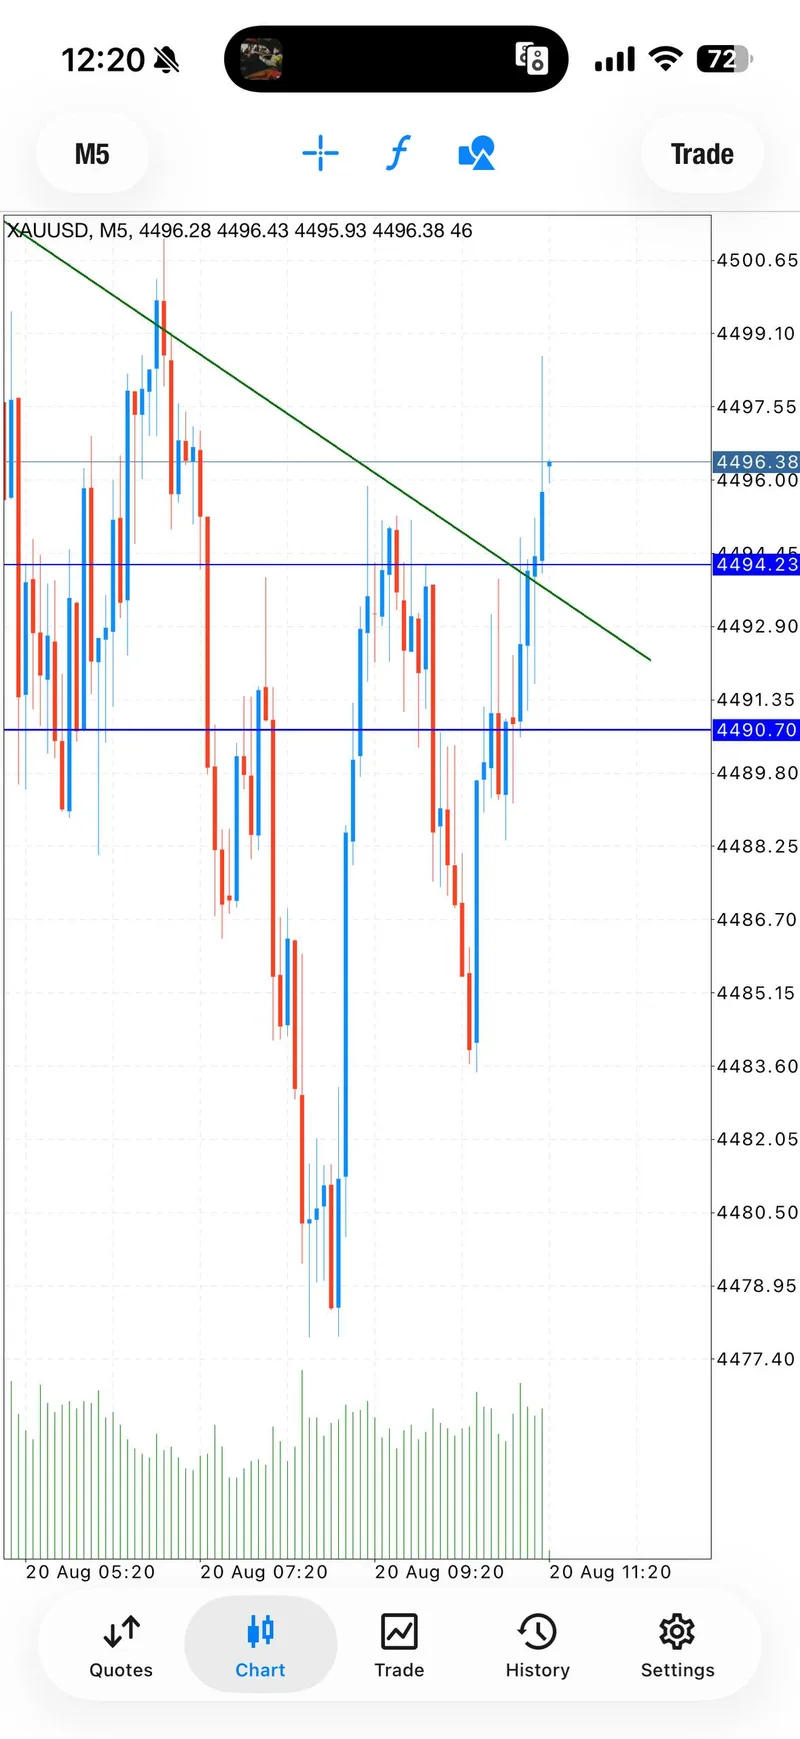
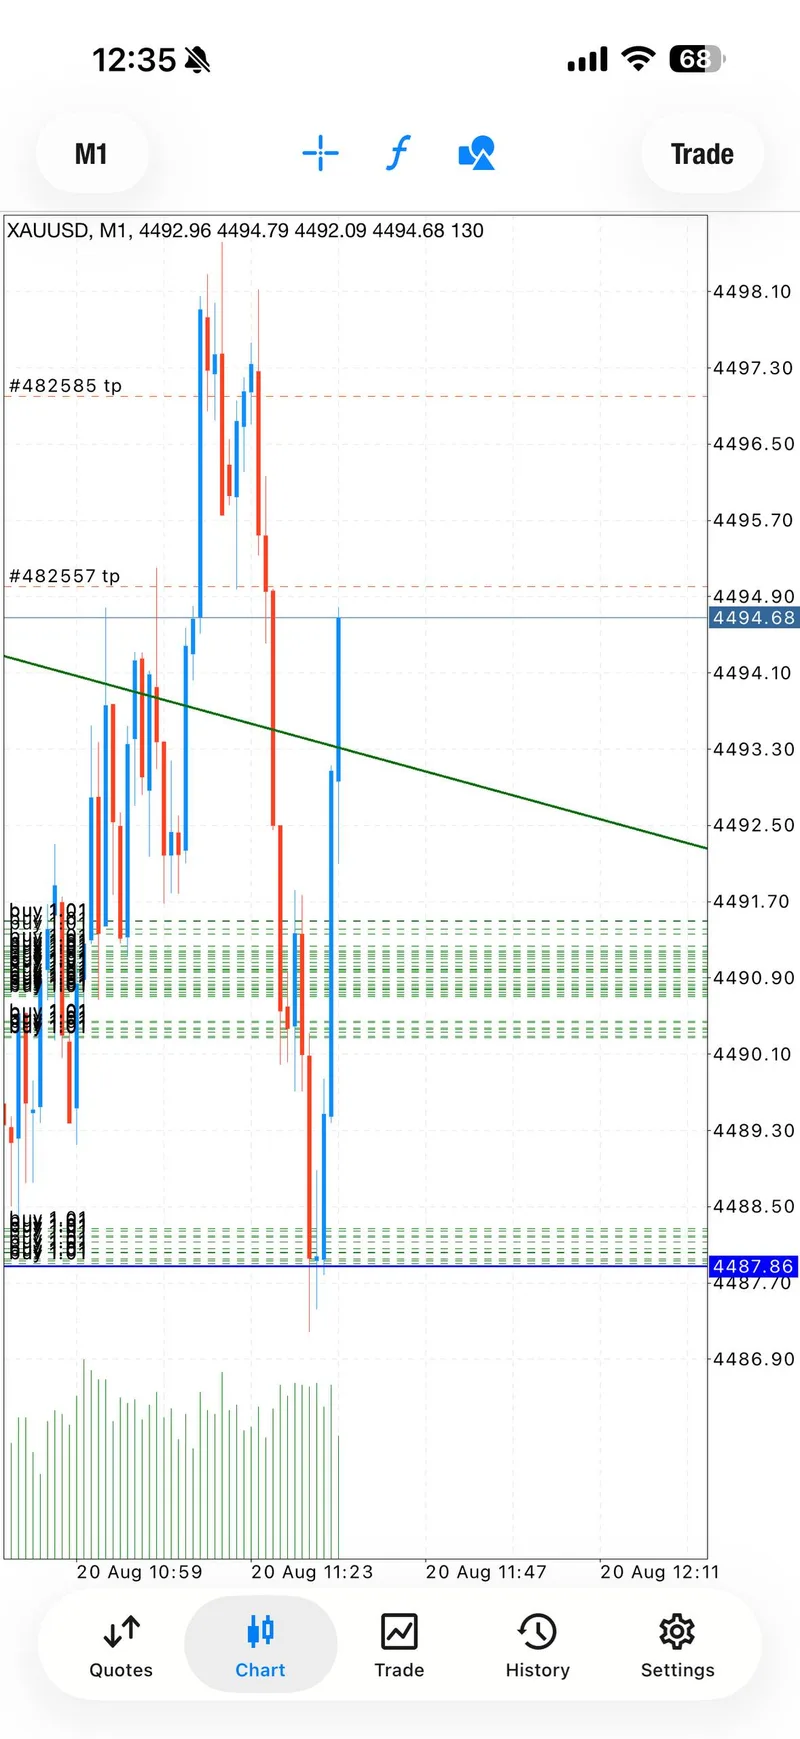
The final setup was a BUY from 4491–4487 with a 4483 stop and targets at 4493, 4495, 4497, 4499 and 4501, followed by an open extension. The public explanation described a breakout, retest and entry rather than an impulsive chase. It was also marked as the last setup for the day.
This sequence carried the clearest positive progression. TP1 was reported, profits were taken and breakeven protection was requested. A TP2 update followed, and the later public wording recorded that the setup hit two targets and then breakeven again. The defensible result is therefore TP1 and TP2 followed by protection at breakeven for the documented entries. It is not a claim that every account or every order had the same fill.
The three setups also show why entry zones, direction, stop level and target progression should be read together. A zone without invalidation is incomplete; a target without an outcome update is only a plan; and a screenshot without a clear session context cannot prove a universal result.
Signal Performance Breakdown#
Counting one parameter set once across the repeated public FREE/VIP notices gives 3 canonical setups. The performance sequence was mixed and easy to misrepresent if the first failed BUY or the later protection notes were omitted:
- The 4494–4490 BUY was closed after invalidation. Its 4486 stop and later 4484 adjustment are part of the public risk trail, not evidence of a win.
- The 4490.8–4495 SELL reached the explicitly reported TP1, then later required a setup-failed update. Only TP1 is promoted for this sequence.
- The 4491–4487 BUY reached TP1 and TP2 in the public updates, after which breakeven protection became the central management instruction. The later result wording supports two targets before breakeven, not a blanket PnL claim.
Exactly 5 member feedback messages were present on the day. They were short greetings from Poland, Slovakia, Sweden, Denmark and the UK, so they are counted as feedback messages but are not presented as testimonials or trading-result proof. The public recap uses 7 selected trading proof screenshots and 0 selected member proof screenshots. Keeping those counts separate prevents a gallery count from being mistaken for the total amount of feedback.
There is also no universal balance or dollar-profit claim in this recap. A single account screenshot, even when authentic, would describe that account and that moment only. The story is stronger when it stays with the details that repeat across the public record: the 3 setup structures, the failed first read, the recovery TP1, the final TP1/TP2 progression and the protection reset.
Readers can compare this shape with the August 14 XAUUSD recap, where the target ladder and breakeven treatment were different. The point of the comparison is not to promise the same outcome. It is to show how the public record changes from session to session while the reporting standard remains precise.
Execution Lessons#
First, invalidation should stay visible. The first BUY did not become more credible because a later setup recovered part of the session. Closing it after the structure failed kept the next decision separate from the previous one.
Second, a directional correction can be part of disciplined execution. The SELL was not presented as a magical reversal; it was connected to the structure that was visible after the earlier BUY failed. When that sequence later needed another reset, the public record kept the limitation visible instead of extending the claim.
Third, partial targets and breakeven protection change the quality of a recap. The final BUY had TP1 and TP2 updates, followed by instructions to protect the remaining entries. That is a management outcome, not a promise that the market must continue in the same direction.
The broader lesson is that a difficult session can still produce useful evidence when the reporting includes the uncomfortable parts. A clean story is not always the truthful story. The August 20 record was valuable because it held the failed idea, the recovery attempt, the later follow-through and the emotional reset in the same frame.
What The Day Means Going Forward#
Going forward, August 20 should be read as a mixed recovery-and-reset session. The public @GTMO channel record showed that the desk could change direction after invalidation, but it also showed the cost of forcing a read too early. The final BUY gave the strongest documented follow-through, yet even that sequence was paired with profit-taking and breakeven protection rather than a promise of unlimited continuation.
For a reader studying the day after the fact, the useful checklist is straightforward: identify the structure, mark the invalidation, distinguish a plan from a completed target, and check whether protection was actually communicated. That framework is more durable than copying an old zone into a new session. Any future signal would need fresh evidence; this page remains a historical recap.
The free channel is available for readers who want the next public context, and @GTMOBest is the route for free signals + FREE VIP channel access. The invitation is deliberately paired with the risk boundary: access to a channel does not remove market risk, and a past session does not guarantee the next one.
FAQ#
What happened to the first BUY?#
The 4494–4490 BUY used a 4486 stop, was later adjusted to 4484, and was publicly closed after the setup failed. This recap does not claim a profitable result for that sequence.
Did the day finish as a clean win?#
No. The evidence supports a mixed session: the first BUY failed, the recovery SELL reached the explicitly reported TP1, and the final BUY reached TP1 and TP2 before breakeven protection. That is a useful recovery sequence, but it is not a universal win-rate or PnL claim.
How many member feedback messages were present?#
Exactly 5 member feedback messages were present. They were greetings rather than testimonials, and none was used as a selected member proof screenshot. The gallery contains 7 selected trading proof screenshots.
Where can readers get free signals and FREE VIP channel access?#
Message @GTMOBest for the free signal channel and the route to ask about FREE VIP channel access. New sessions must always be judged on new evidence and current risk.
Connect with Gold Trader Mo#
Readers who want to follow the next public gold update can visit Gold Trader Mo and message @GTMOBest for free signals + FREE VIP channel access. The public channel is the place to follow new context; this report is the place to review what happened on August 20 with the failed BUY, recovery SELL, final BUY targets and breakeven protection kept in their proper order.
What readers can expect from the free lane:
- Historical context that names the entry zone, direction, stop and target progression when the public record supports them.
- Clear separation between a completed target, a failed setup, a breakeven protection update and an unverified claim.
- A direct path to Gold Trader Mo’s public updates without turning yesterday’s levels into today’s instruction.
This daily report is for education and commentary only. It is not financial advice. Trading involves risk, capital can be lost, and past performance never guarantees the next session will look the same.