
Market Snapshot#
The strongest August 11 story was not a generic gold forecast. It was a public sequence of two clearly parameterized BUY setups: the first moved from the 4362-4358 zone through four reported target stages, and the second arrived later from 4394-4390 before reaching TP2, breakeven and a close-all update. Readers who want free signals and FREE VIP channel access can message @GTMOBest.
This is a historical recap of the August 11 session, not a live trade instruction. The entry zones, stop levels and targets below belong to that past public record and should not be copied as current prices.
Market context supported a volatile day. Contemporaneous market reporting put spot gold near an intraday high around $4,435 before the latest observed print moved toward roughly $4,335. The reading was still intraday rather than a final daily close. The same context described a firmer dollar, higher Treasury yields, stronger crude oil and inflation pressure ahead of US CPI. Those factors help explain the backdrop, but the public GTMO record is what documents the trade sequence.
| Historical market reference | Approximate context |
|---|---|
| Spot gold latest observed | Around $4,335 intraday, not a final close |
| Intraday high | Around $4,435.20 |
| Resistance context | Around $4,400 and $4,435 |
| Support context | Around $4,360 and $4,316 |
The market table is deliberately approximate because global spot, index and futures feeds use different timestamps. The report does not turn an intraday quote into a false official close.
Why The Tone Changed So Fast#
The public morning commentary described Asia pushing gold lower by roughly 780 pips, then watched London touch the Asian low before waiting for confirmation. That matters because the first BUY was not presented as a blind chase. The record described waiting for bulls to push back above structure and form a higher low before committing more heavily.
Once the 4362-4358 zone appeared, the tone changed from watching the reversal to managing it. The channel reported partial profits, then TP2, then TP3 and breakeven. The progression kept the story anchored to what was visible at each stage instead of rewriting the day from the final chart.
The second change came after the first sequence had finished its main target run. Members were asked whether they wanted one more trade, and the later BUY from 4394-4390 was published with its own stop and five target references. That separation is why this recap counts two parameterized BUY setups, not three: each bare Gold buy now lead-in belongs to the full zone that followed it.
Technical Outlook#
The historical market context showed a sharp intraday reversal from the 4,435 area toward the 4,335 area, while the GTMO record worked from two much tighter decision zones. The first BUY used 4362-4358 with an SL at 4353. The second used 4394-4390 with an SL at 4385. These are past-session reference points, not current signals.
For readers studying the sequence after the fact, the useful technical lesson is the separation between a broad market move and a precise execution area. The public record waited for confirmation near the lower zone, then used layered targets rather than requiring one perfect exit. Later, the second setup was managed around the 4390s with protection once TP2 was reported.
A helpful comparison is the August 10 recovery recap, where the public sequence was defined by a difficult first close followed by adaptation. The August 7 report shows a different recovery-and-target structure, while the August 6 report is useful for comparing another BUY with staged protection.
Trading Signals#
Signal 1#
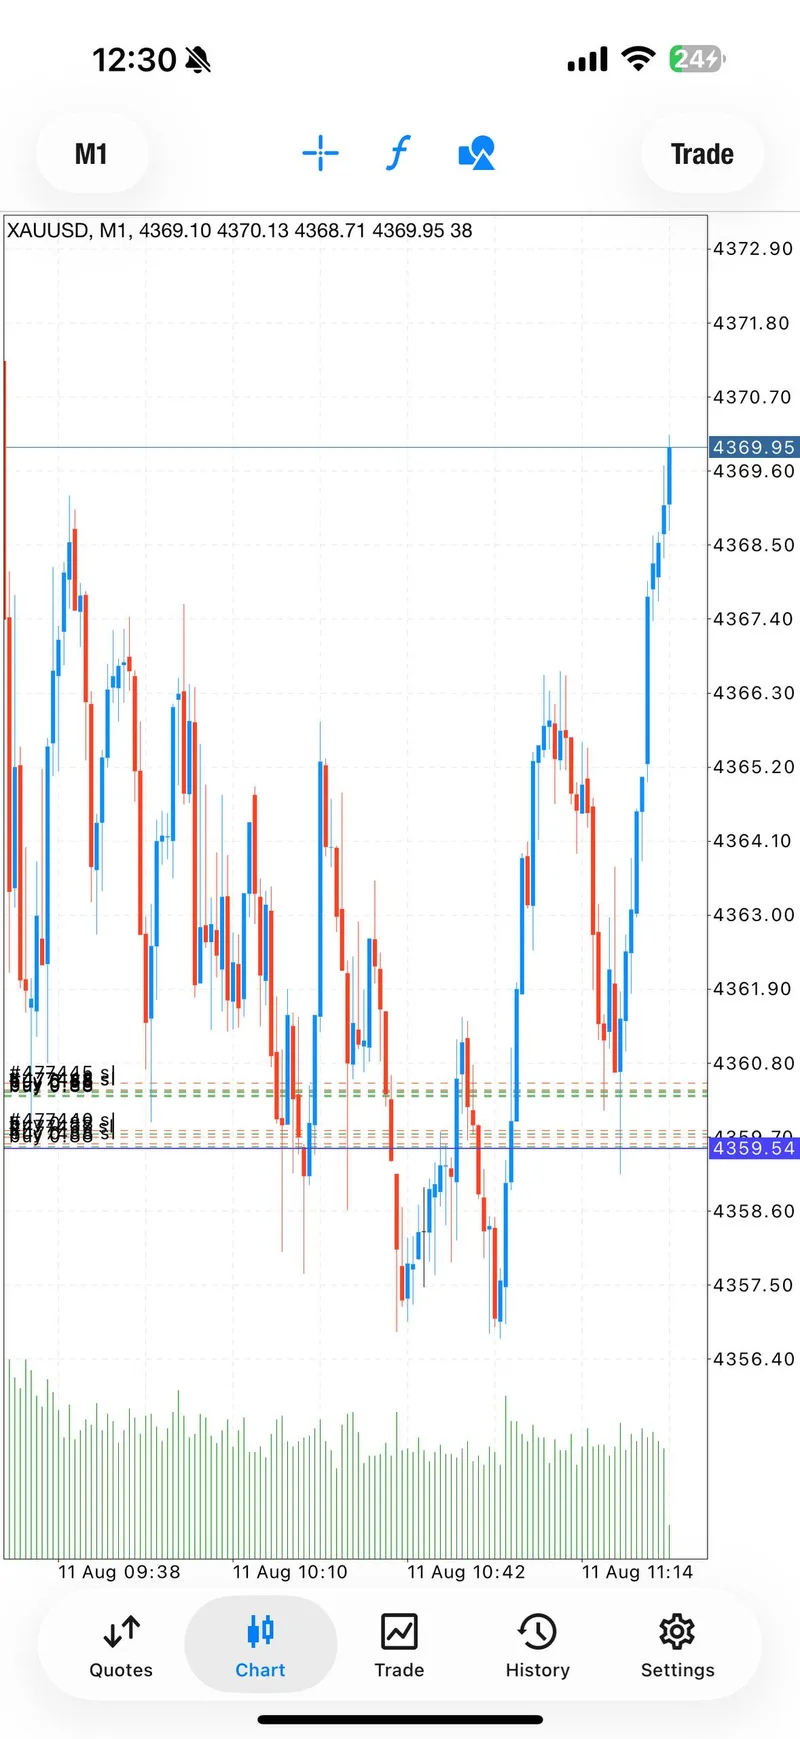
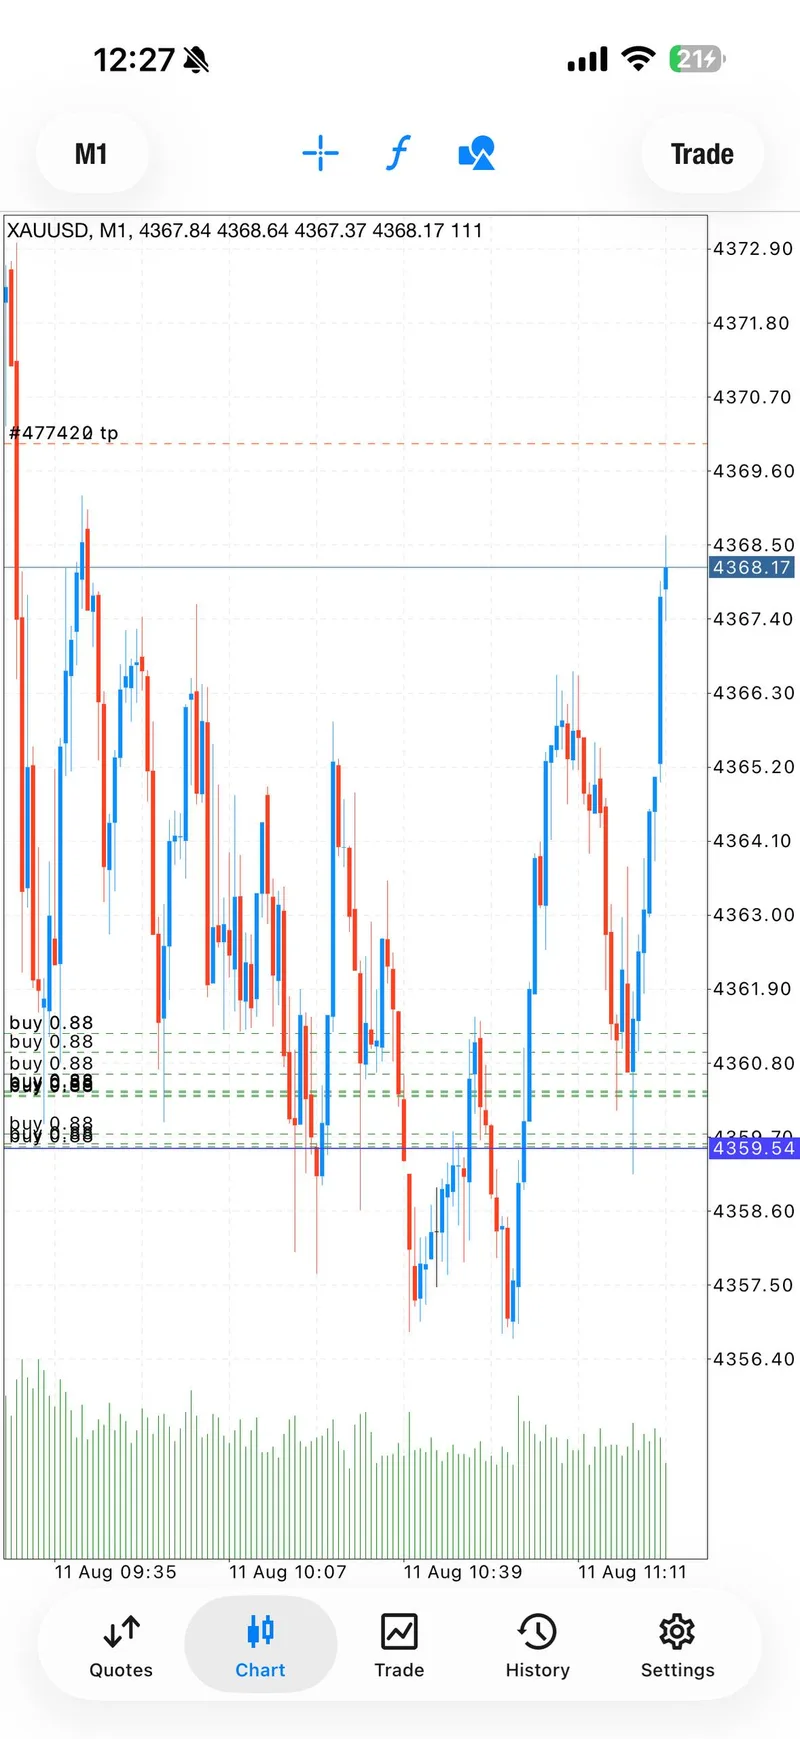
BUY — historical entry zone 4362-4358; SL 4353.
The full public setup listed TP1 4364, TP2 4366, TP3 4368, TP4 4370 and an open target. The sequence then reported:
- TP1 and partial profit-taking.
- TP2 as momentum continued.
- TP3 followed by a breakeven instruction.
- Most profit closed while the remaining position was protected.
- All four targets reported complete, followed by a 100+ pip update.
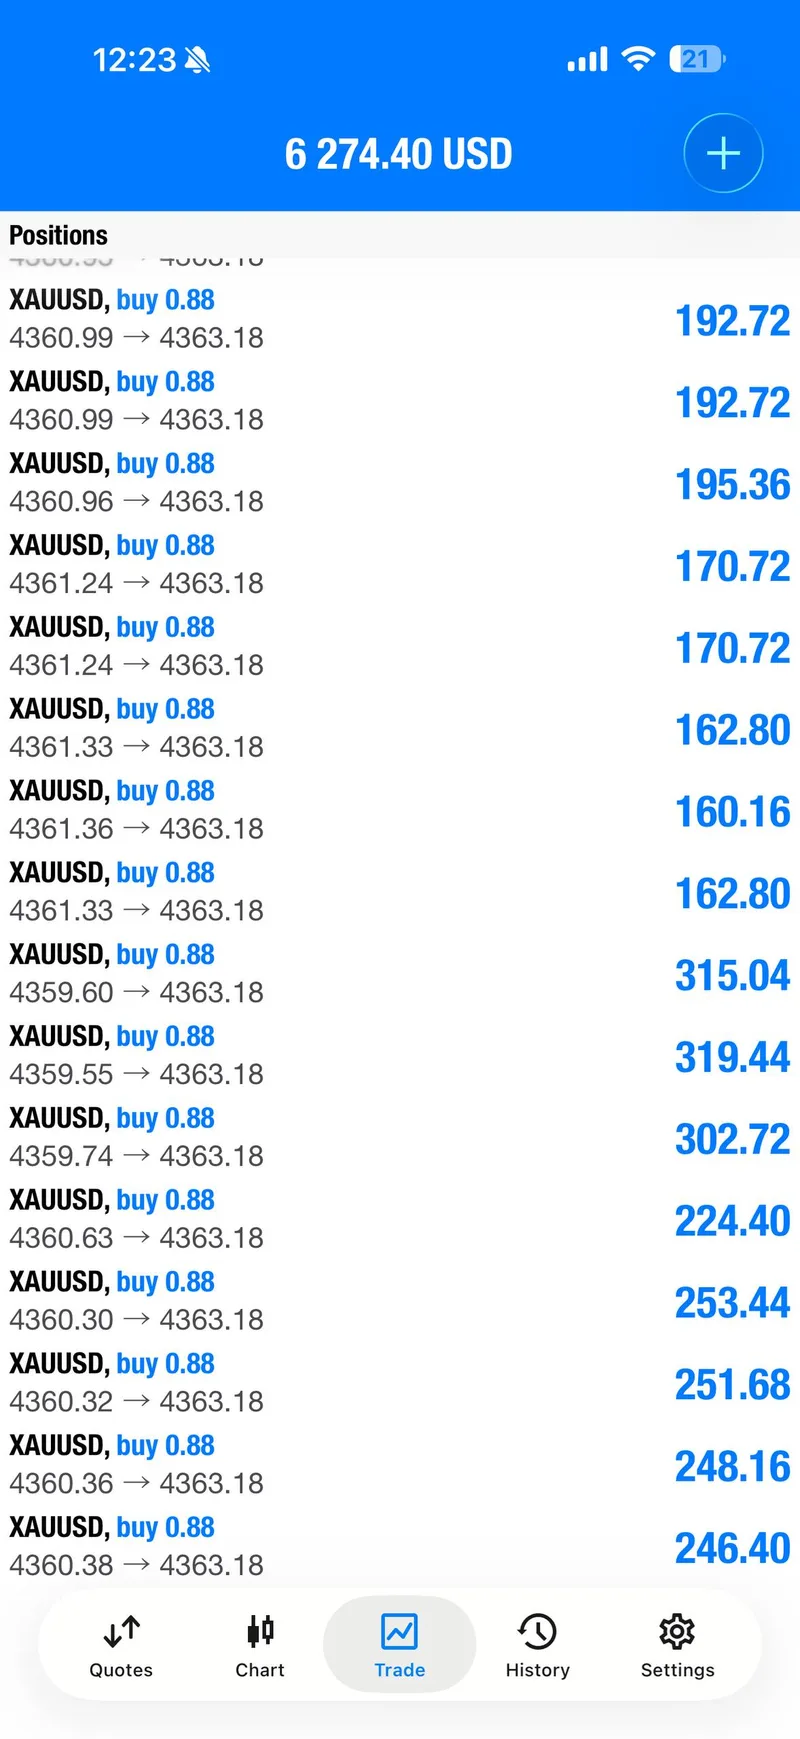
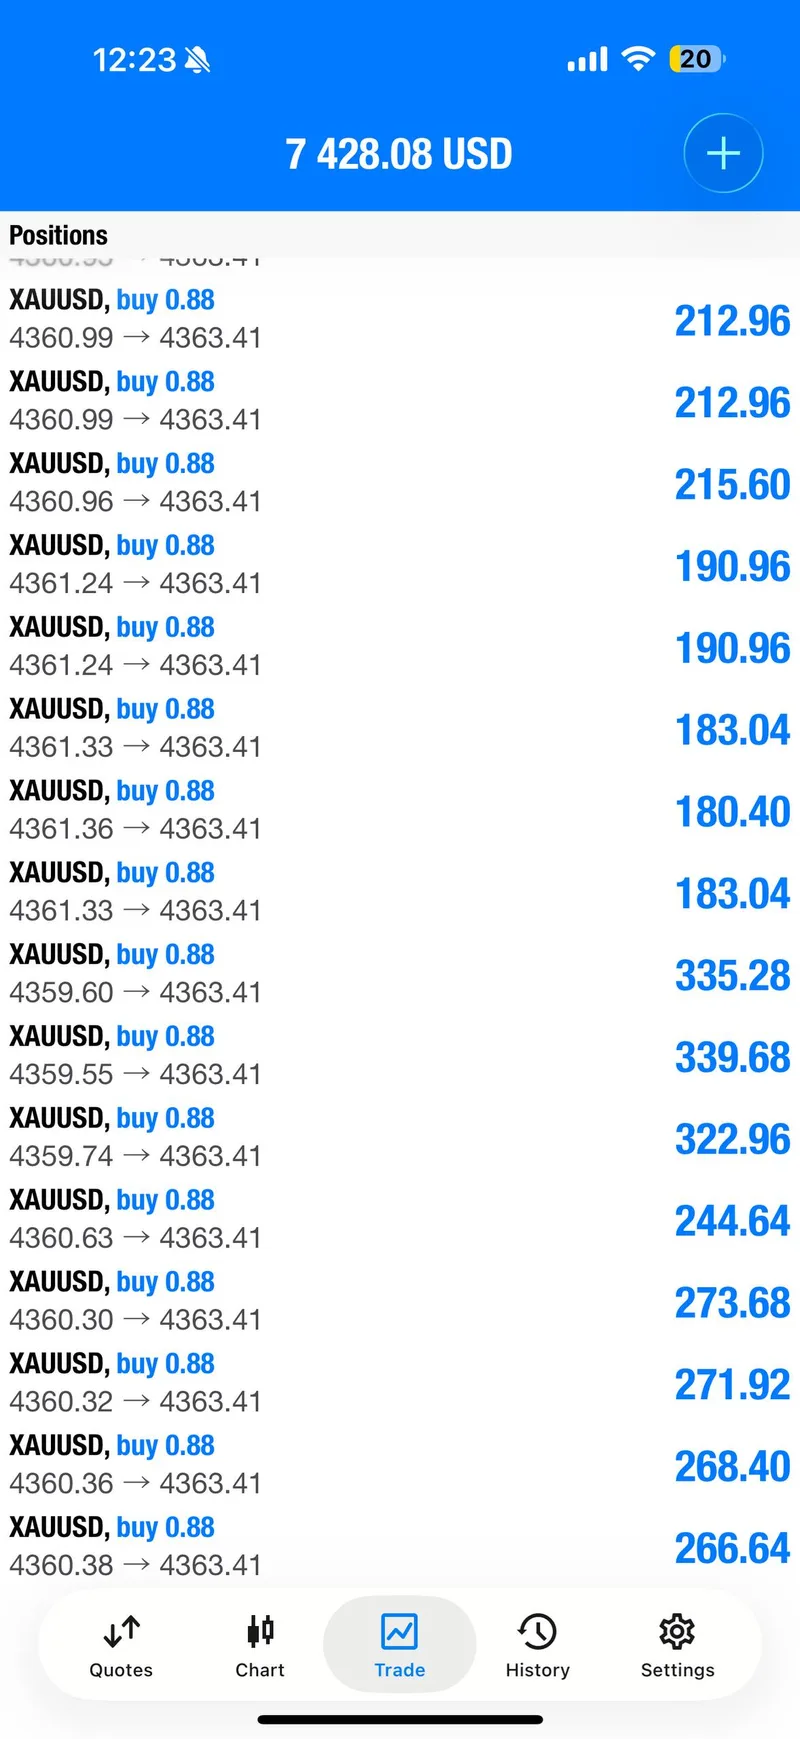
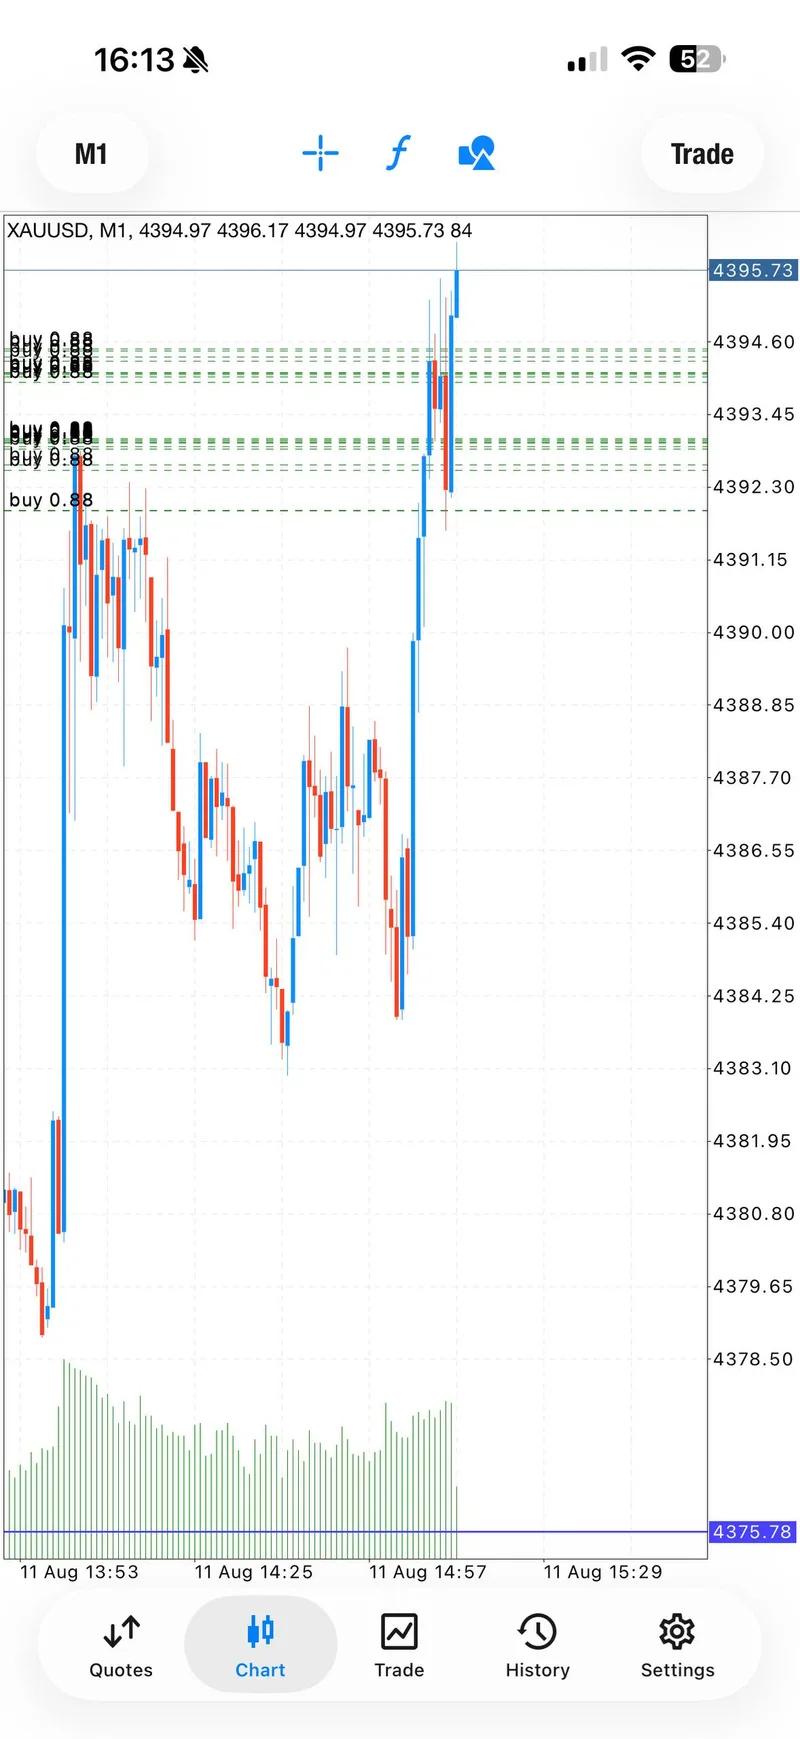
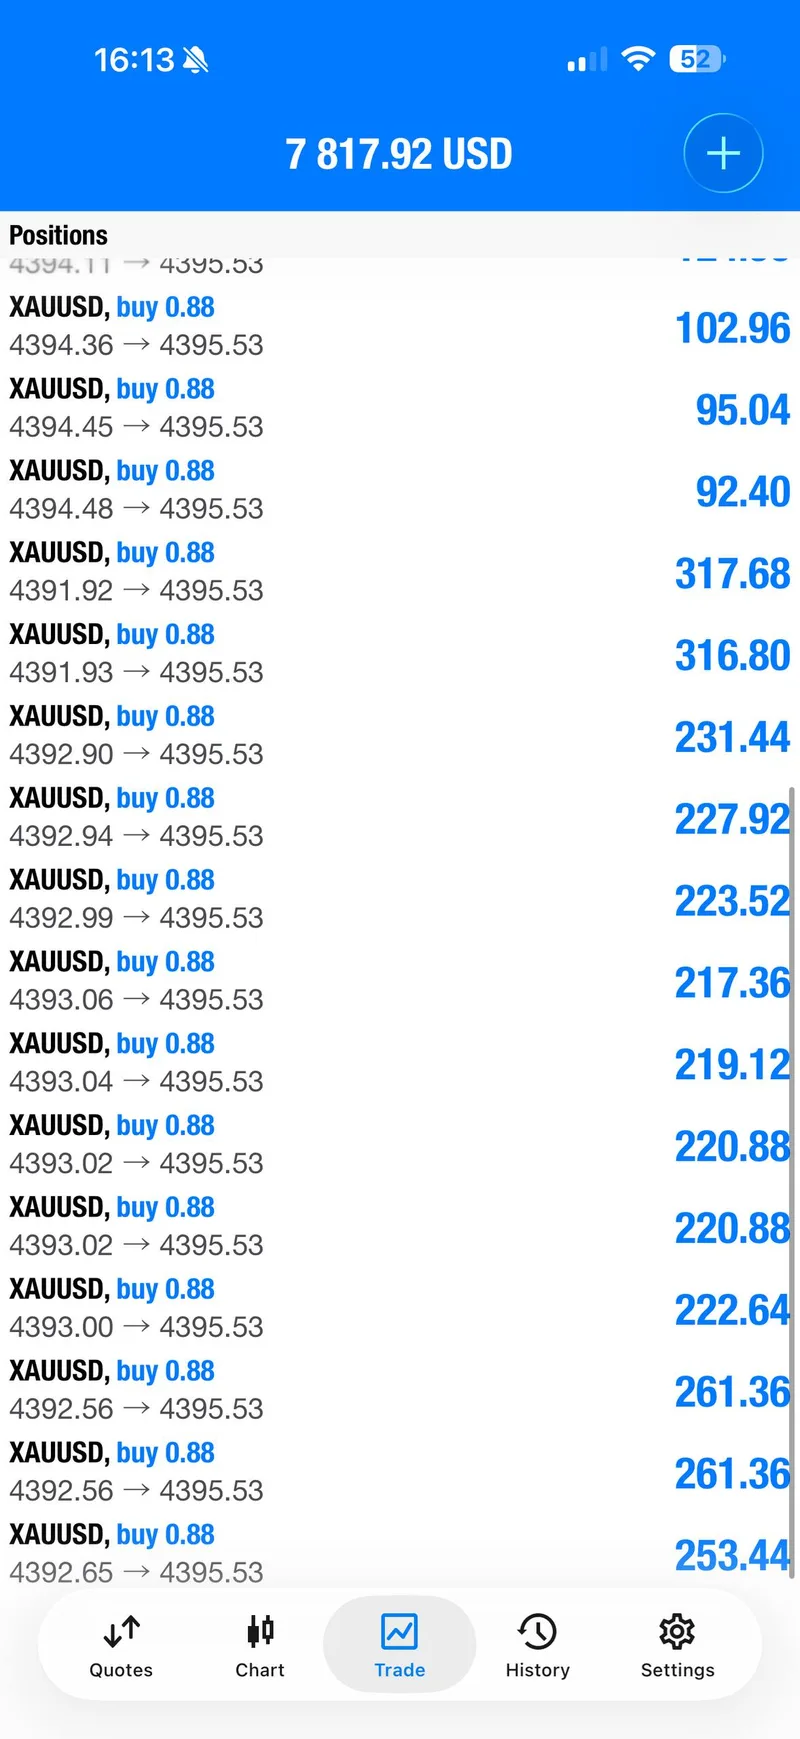
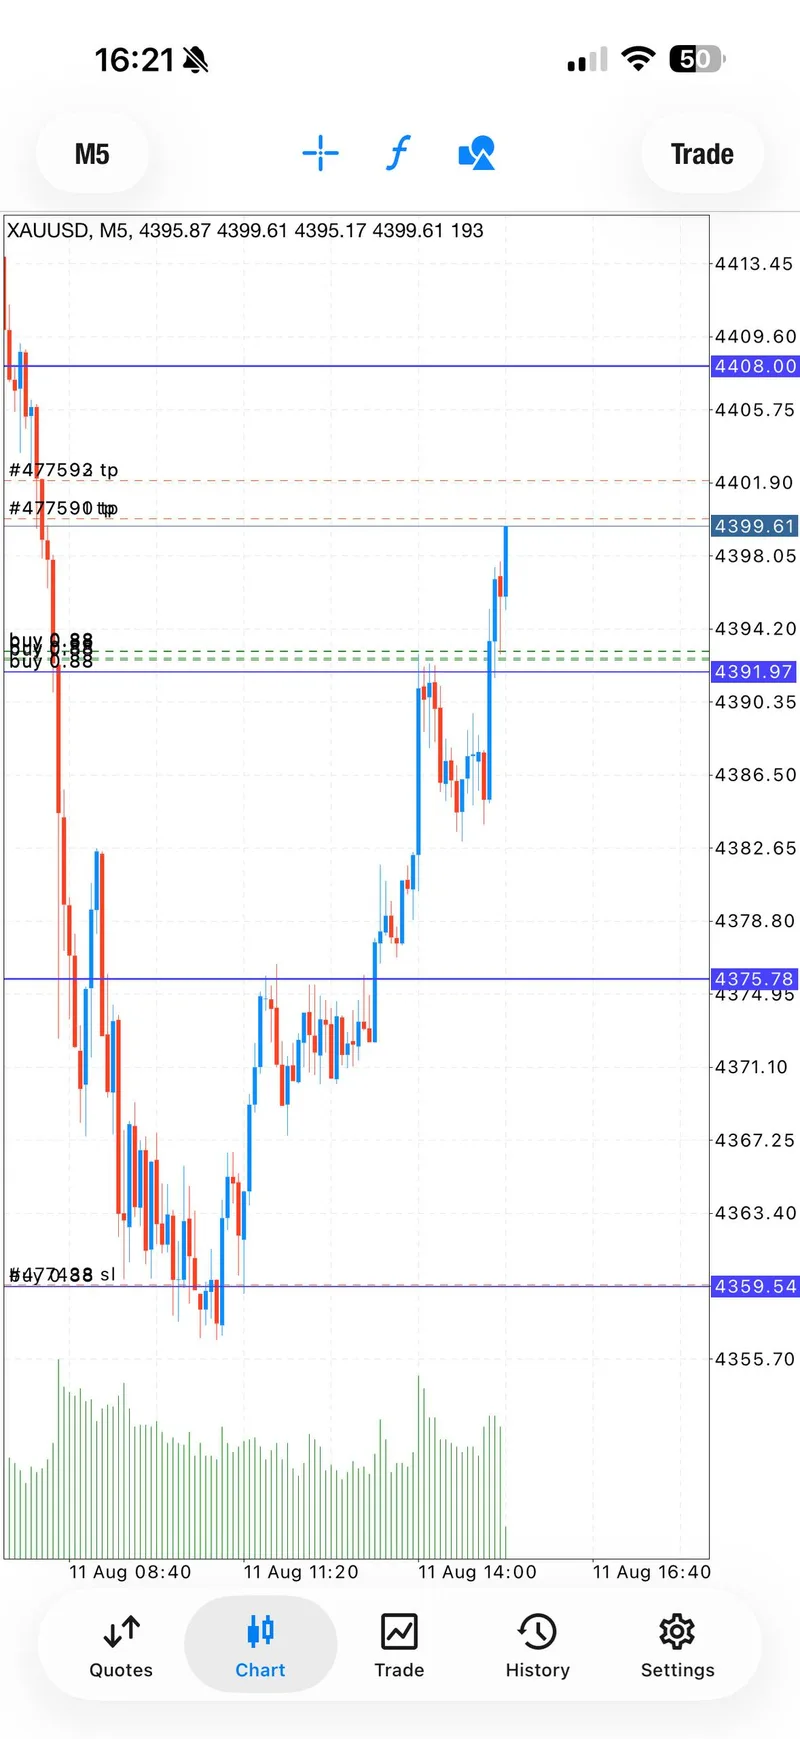
The chart and account screenshots in the profit gallery show the same-day move from the 4360 area toward the 4369-4370 area. The value of this sequence is the management order: confirmation, partials, protection, then the final target report.
Signal 2#
BUY — historical entry zone 4394-4390; SL 4385.
The later public setup listed TP1 4396, TP2 4398, TP3 4400, TP4 4402 and an open target. It moved quickly into profit, then the record reported:
- TP2 incoming and then TP2 done.
- Half-profit protection and breakeven.
- No more risk for the protected sequence.
- A close-all update, followed by another two target references in the public recap.
The article keeps the claim bounded: the same-day public sequence clearly documents TP1, TP2, breakeven and close-all for this second setup, but it does not promote a clean TP4 completion for it. That kind of boundary is more useful than making every setup sound identical.
Signal Performance Breakdown#
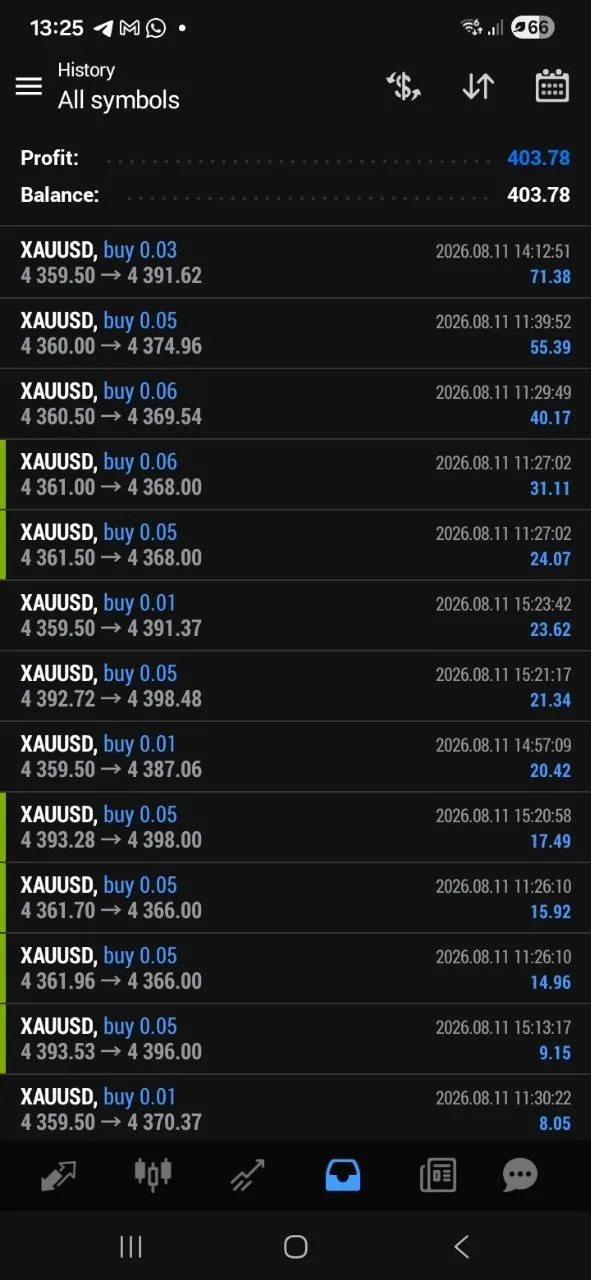
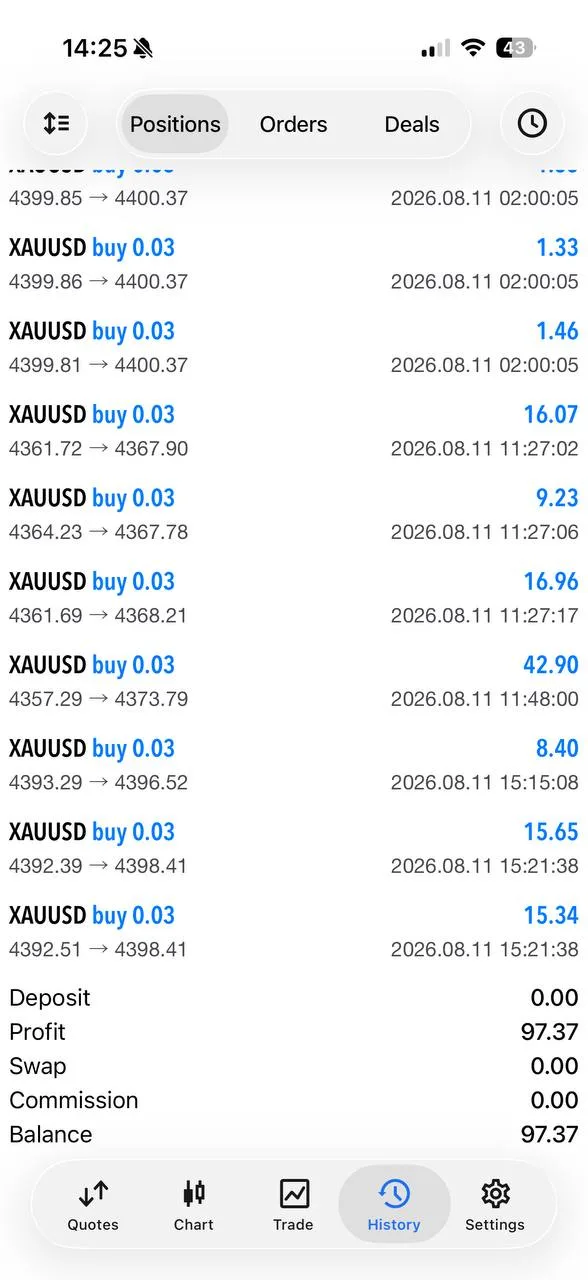
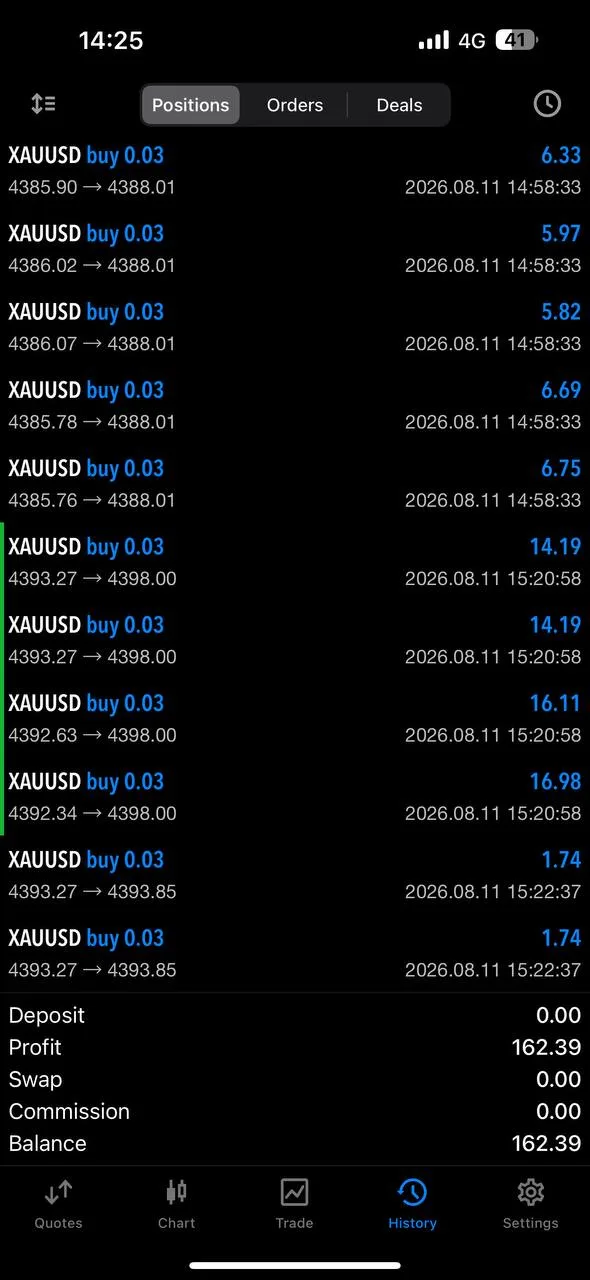
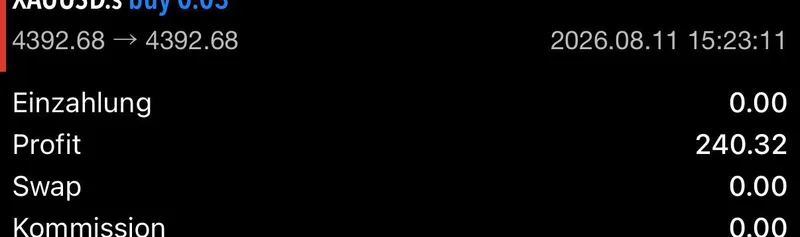
The first BUY is the headline proof point: four target stages were reported from the 4362-4358 zone, with breakeven protection before the final target update. The second BUY added a separate continuation story: TP1 and TP2 were reported from 4394-4390, followed by breakeven and close-all language.
The public record contained exactly 38 member messages. Four member-result screenshots were selected for the community gallery, while seven trading screenshots were selected to show entry-area context, target progression and account-level movement. That makes 11 selected public proof screenshots in total; the member-message count and gallery count are intentionally different measurements.
Several member responses made the day feel human rather than like a scoreboard. Scott Pilcher wrote, “Beautifully explained and a well executed trade.” Dylan Drake highlighted that the retrace and entry were explained clearly. Danielius Venus wrote, “Awesome, this buy hit TP3.” Nadja Promehl described the trades as “Easy-to-understand trades that you can implement.” These are individual reactions, not guarantees about what every reader earned.
The four community screenshots show individual results of $403.78, $97.37, $162.39 and $240.32. They are presented as account-specific public proof from the session, not as a typical outcome or a promise.
Execution Lessons#
First, confirmation can be part of the trade. The morning record watched the Asian low and waited for a structural push before treating the BUY as a serious setup.
Second, staged targets reduce the pressure to predict one perfect exit. On the first sequence, partial profit-taking and breakeven appeared before the fourth target report. On the second, TP2 was used as the point where protection became the priority.
Third, a historical recap earns more trust when it distinguishes what was reported from what was not. The first setup has an explicit four-target completion. The second has strong TP1, TP2, breakeven and close-all evidence, but this report does not upgrade that into a clean TP4 claim.
Finally, member screenshots need context. A visible account figure can prove that one member posted a result on that date, but it cannot prove that every account used the same size, entry, broker or exit.
What The Day Means Going Forward#
August 11 is useful because it shows a process that can be read in order: wait for structure, publish the zone, manage partials, remove risk and let the public record show the outcome. The first BUY delivered the strongest target story, while the second showed why protection remains important even when momentum looks fast.
Readers do not need to treat these old levels as a forecast. They can use the recap to ask better questions before the next setup: what confirms the move, where is the invalidation, when does a partial make sense, and how will risk be handled if the next target does not arrive?
For a different example of how the desk handles a mixed session, compare the August 10 XAUUSD recap. For a cleaner continuation example, the August 7 target recap provides useful contrast.
FAQ#
Why does this report count two trades instead of three?#
The public @GTMO channel record contains two full parameterized BUY zones: 4362-4358 and 4394-4390. Each was preceded by a shorter Gold buy now alert. The shorter alerts are treated as the opening notice for the full setup that followed, so they are not counted as separate trades.
Did both BUY setups reach all four targets?#
The first sequence reported TP1 through TP4 and a later 100+ pip update. The second reported TP1 and TP2, then breakeven and close-all updates. This recap does not claim a clean TP4 completion for the second sequence.
Are the member account figures typical results?#
No. The four selected screenshots show individual public results from August 11. Account size, entry count, broker conditions and exit choices differ, so the figures should not be read as typical or guaranteed returns.
Where can I ask about free signals and FREE VIP channel access?#
Message @GTMOBest. The handle is the direct path for questions about the free signal lane and FREE VIP channel access.
Connect with Gold Trader Mo#
Want free gold signals and FREE VIP channel access? Message @GTMOBest and follow Gold Trader Mo for the next historical recap and public market context.
The free lane is designed to make the process easier to follow: public gold updates, clearer historical context, staged target language and risk-aware explanations. This article is a past-session editorial recap, not a live call. Trading involves risk, capital can be lost, and past performance does not guarantee future results.
Message @GTMOBest today for free signals and FREE VIP channel access.